Blog: Archaeology: Portable Antiquities Scheme (PAS Cymru)

Deconstruction: Blocklifting from the Blocklift

28 October 2011

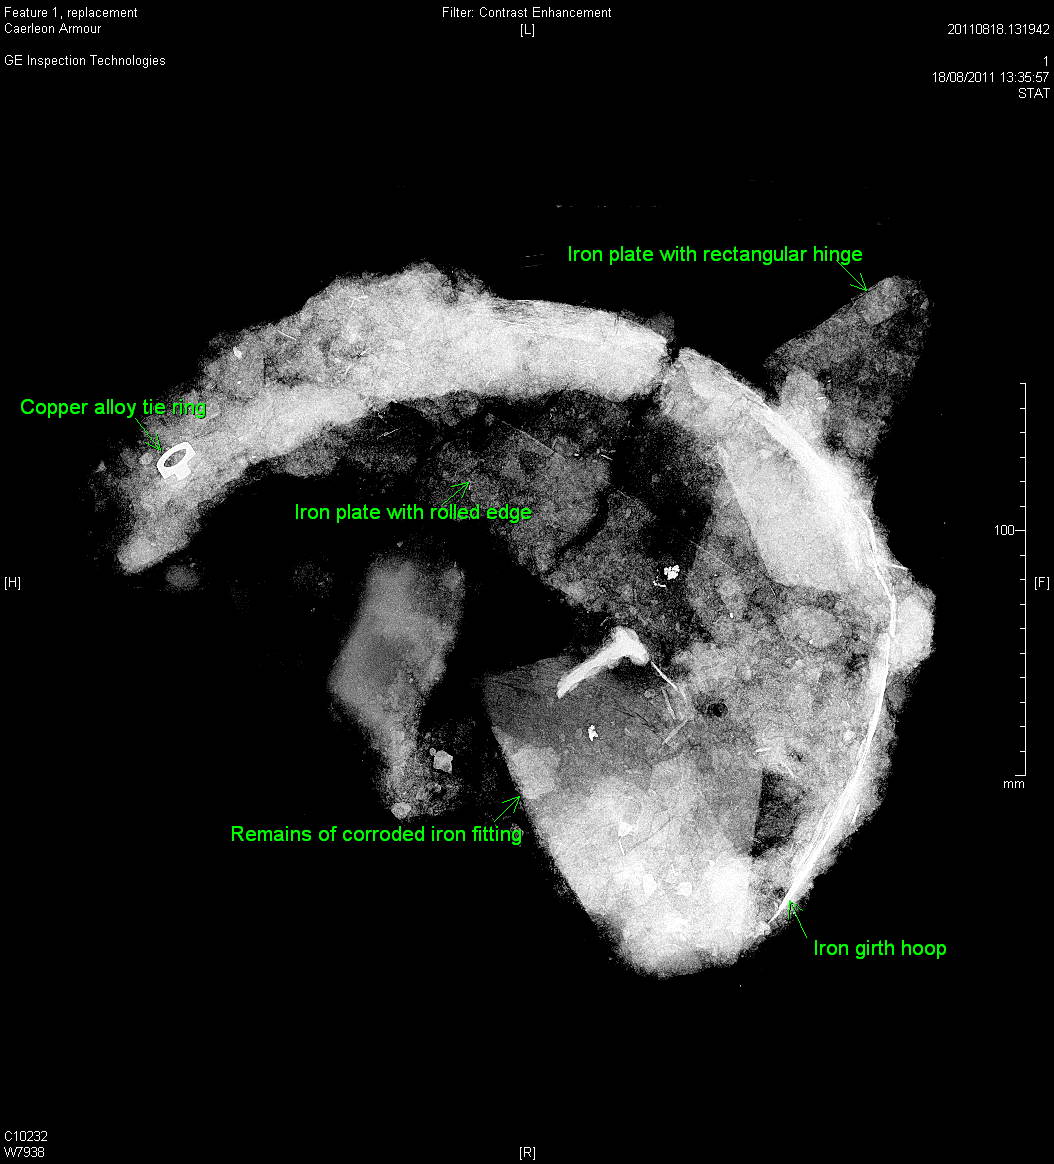
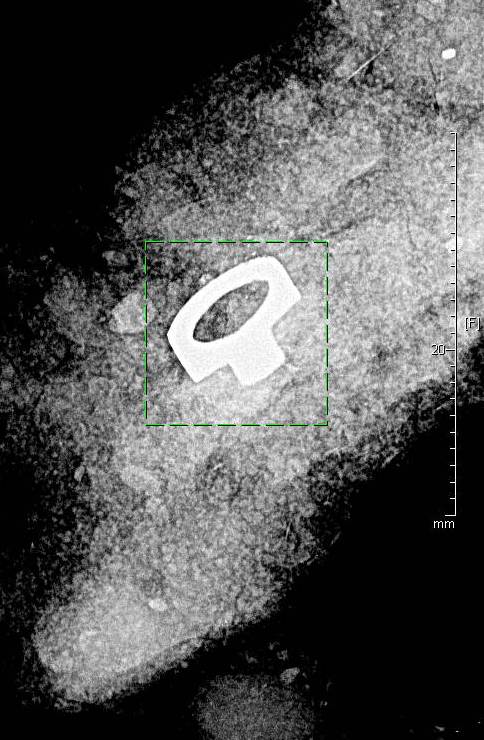
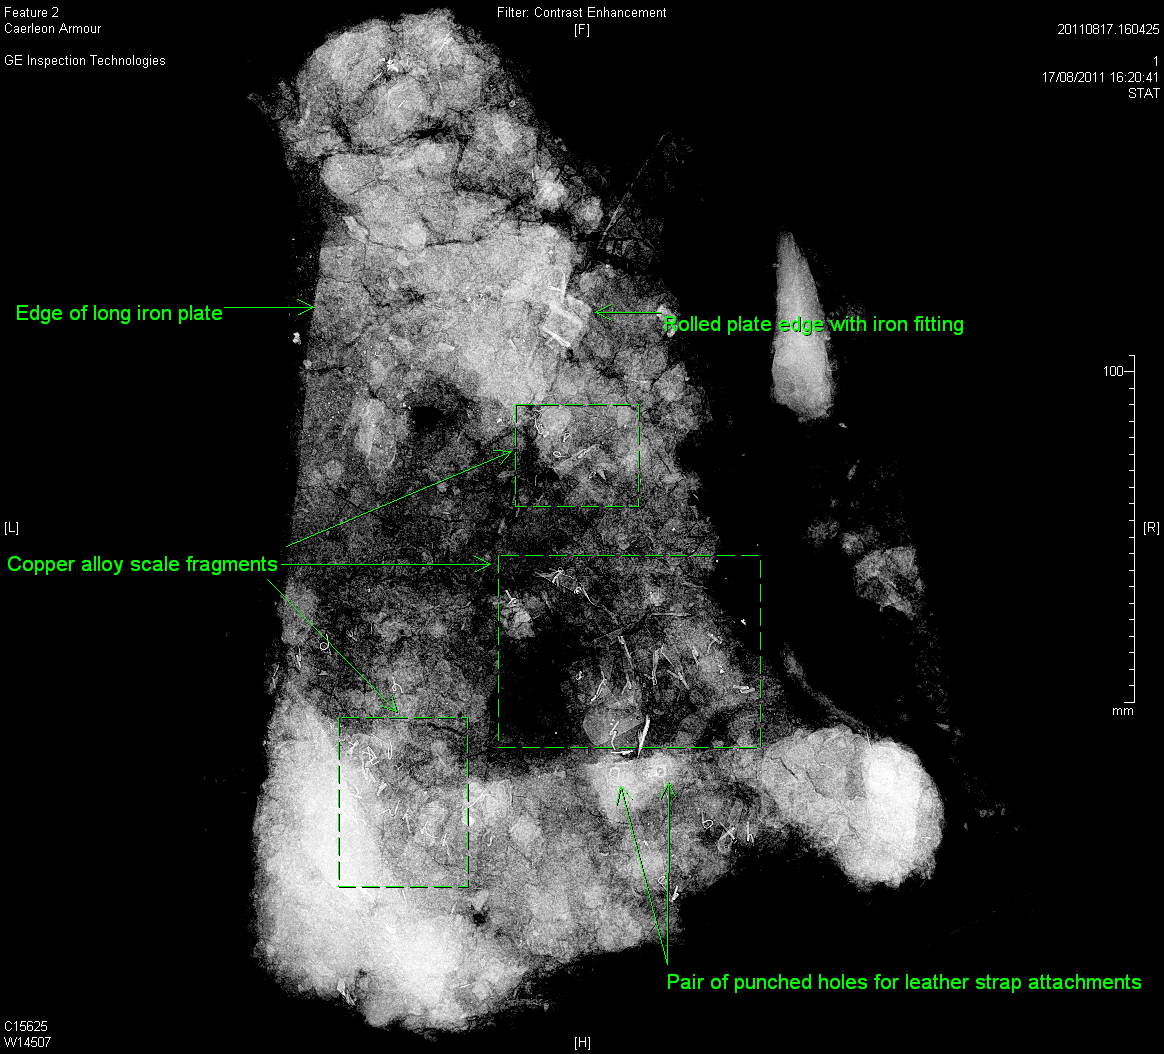
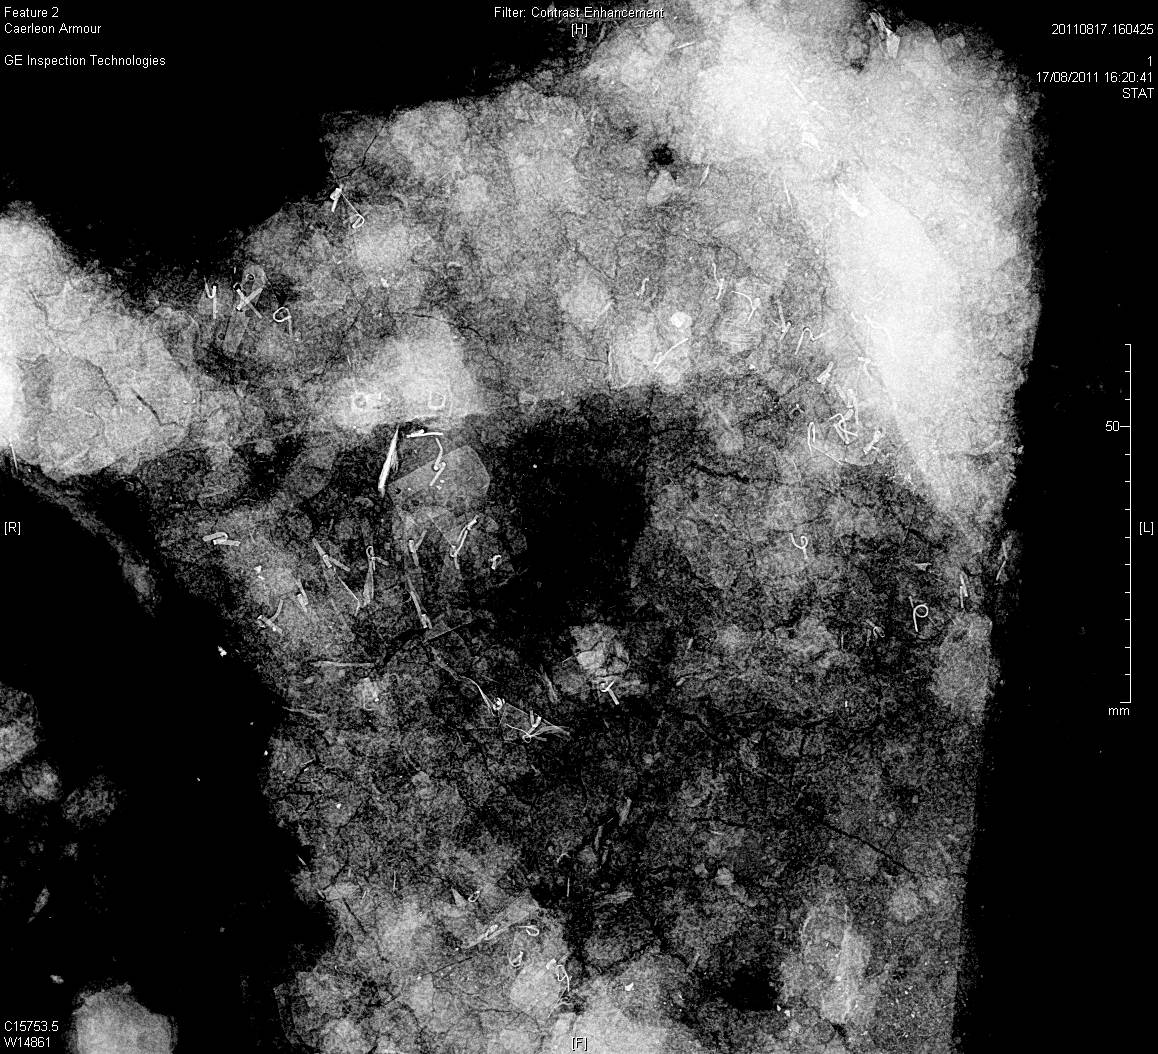
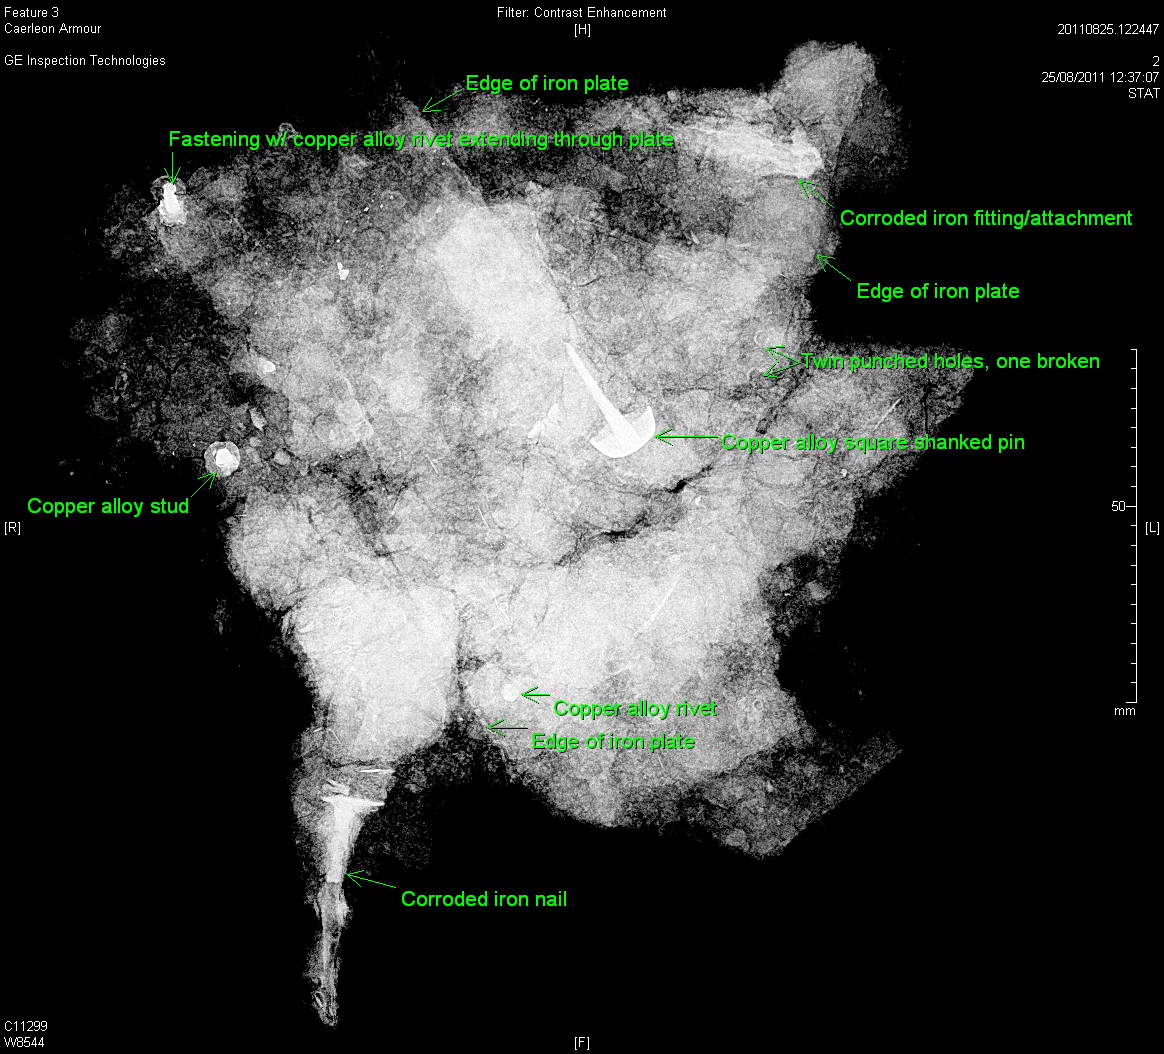
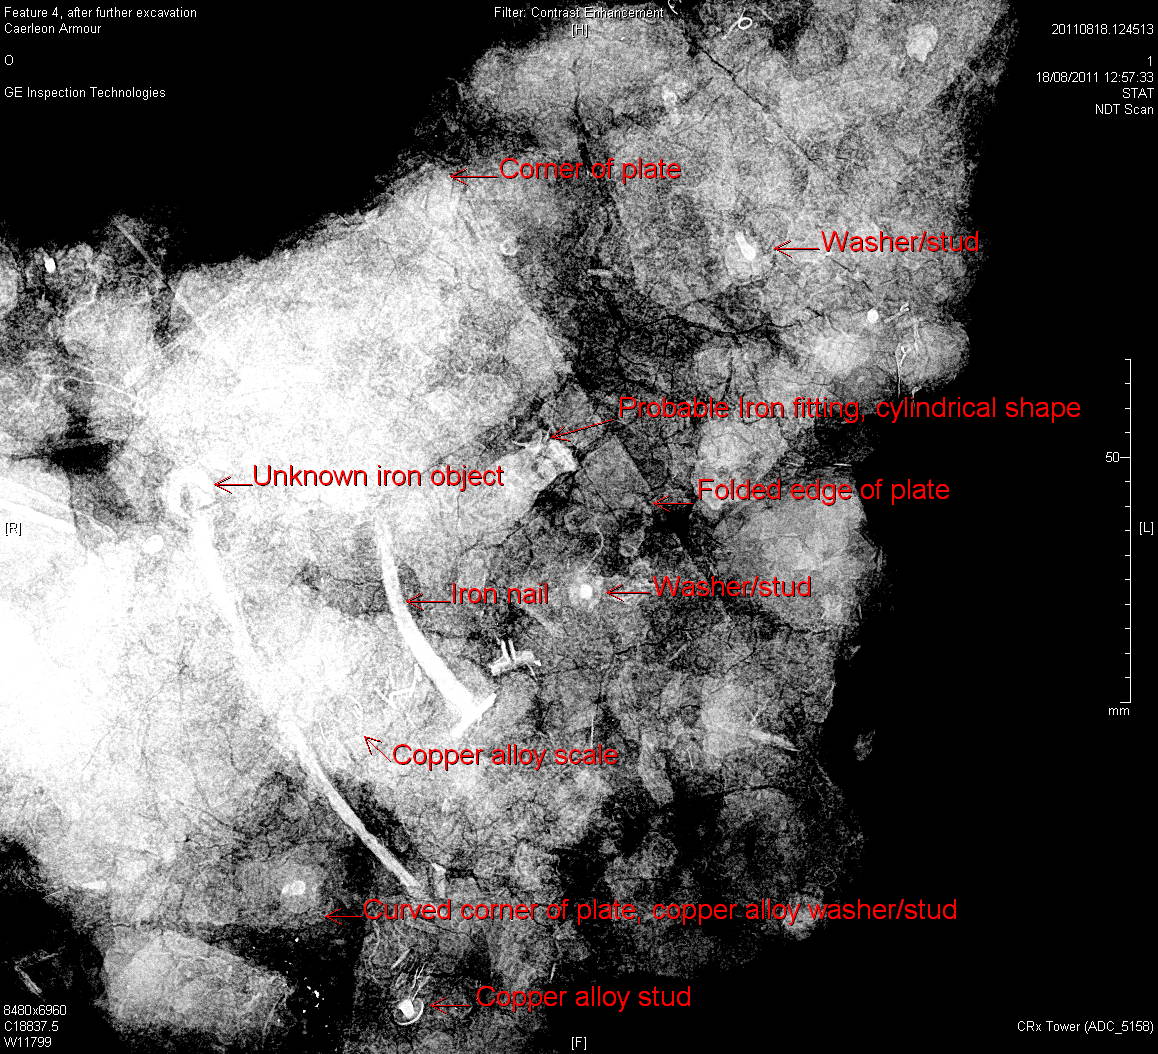
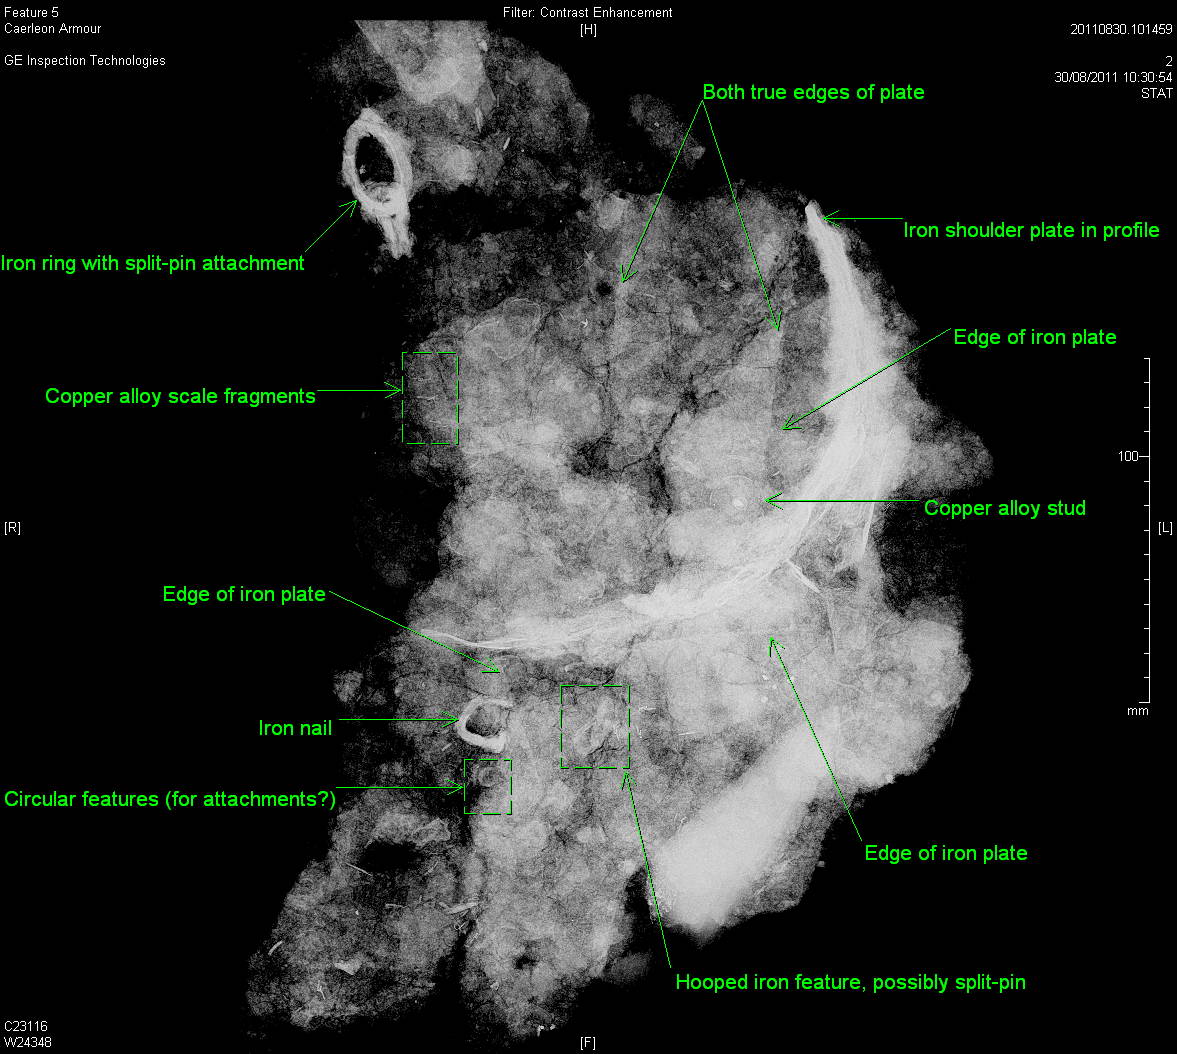
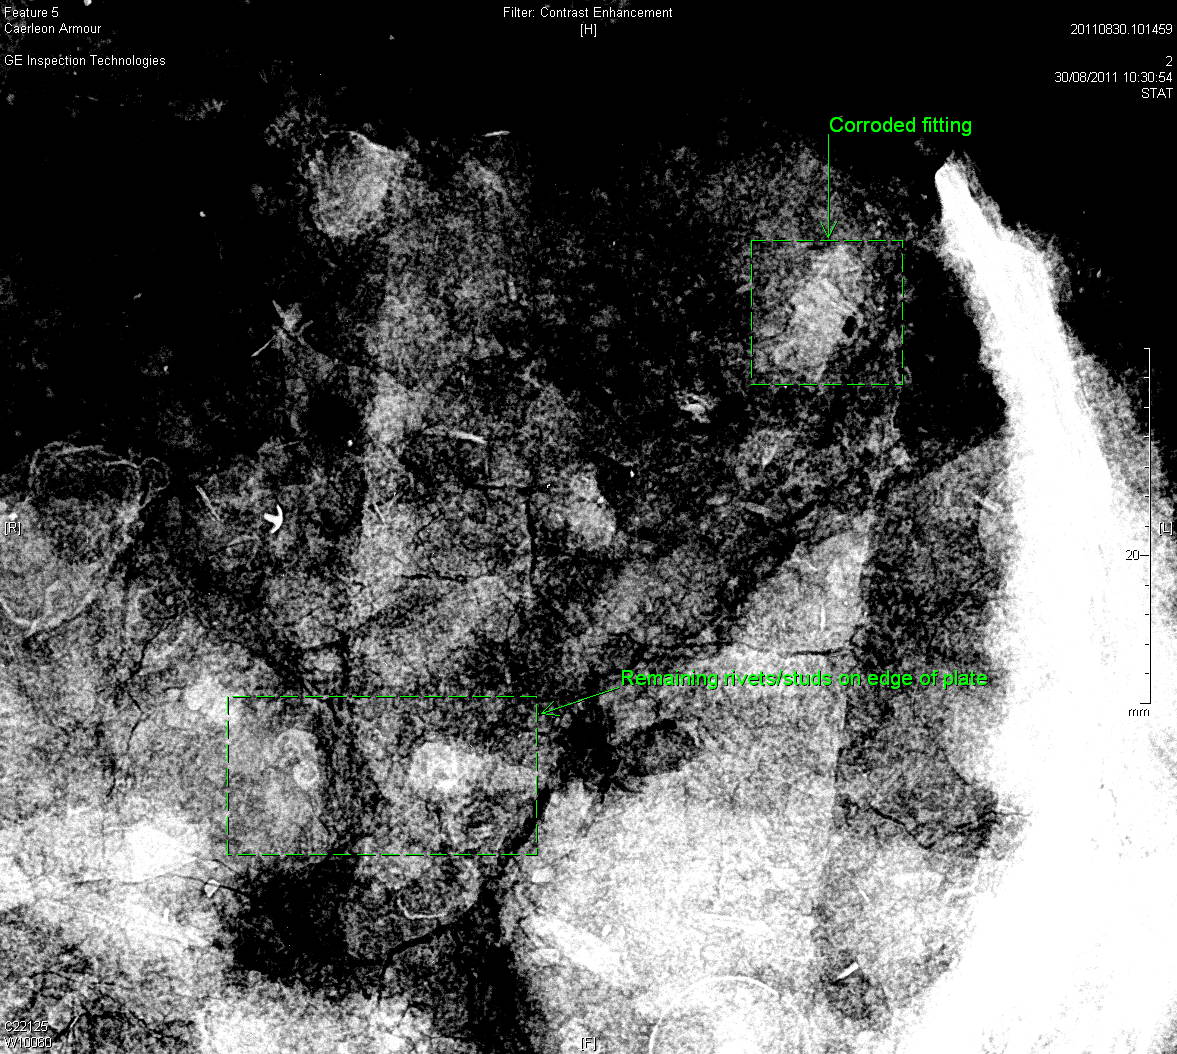
As mentioned in the previous post, the only way to advance the study of this large blocklift was to take x-rays of the excavated ‘features’, in order to get a better idea of the condition of the archaeological metals, and to see if there were objects beneath the ones excavated. For this to happen, the five features had to be separated and lifted in miniature blocklifts.

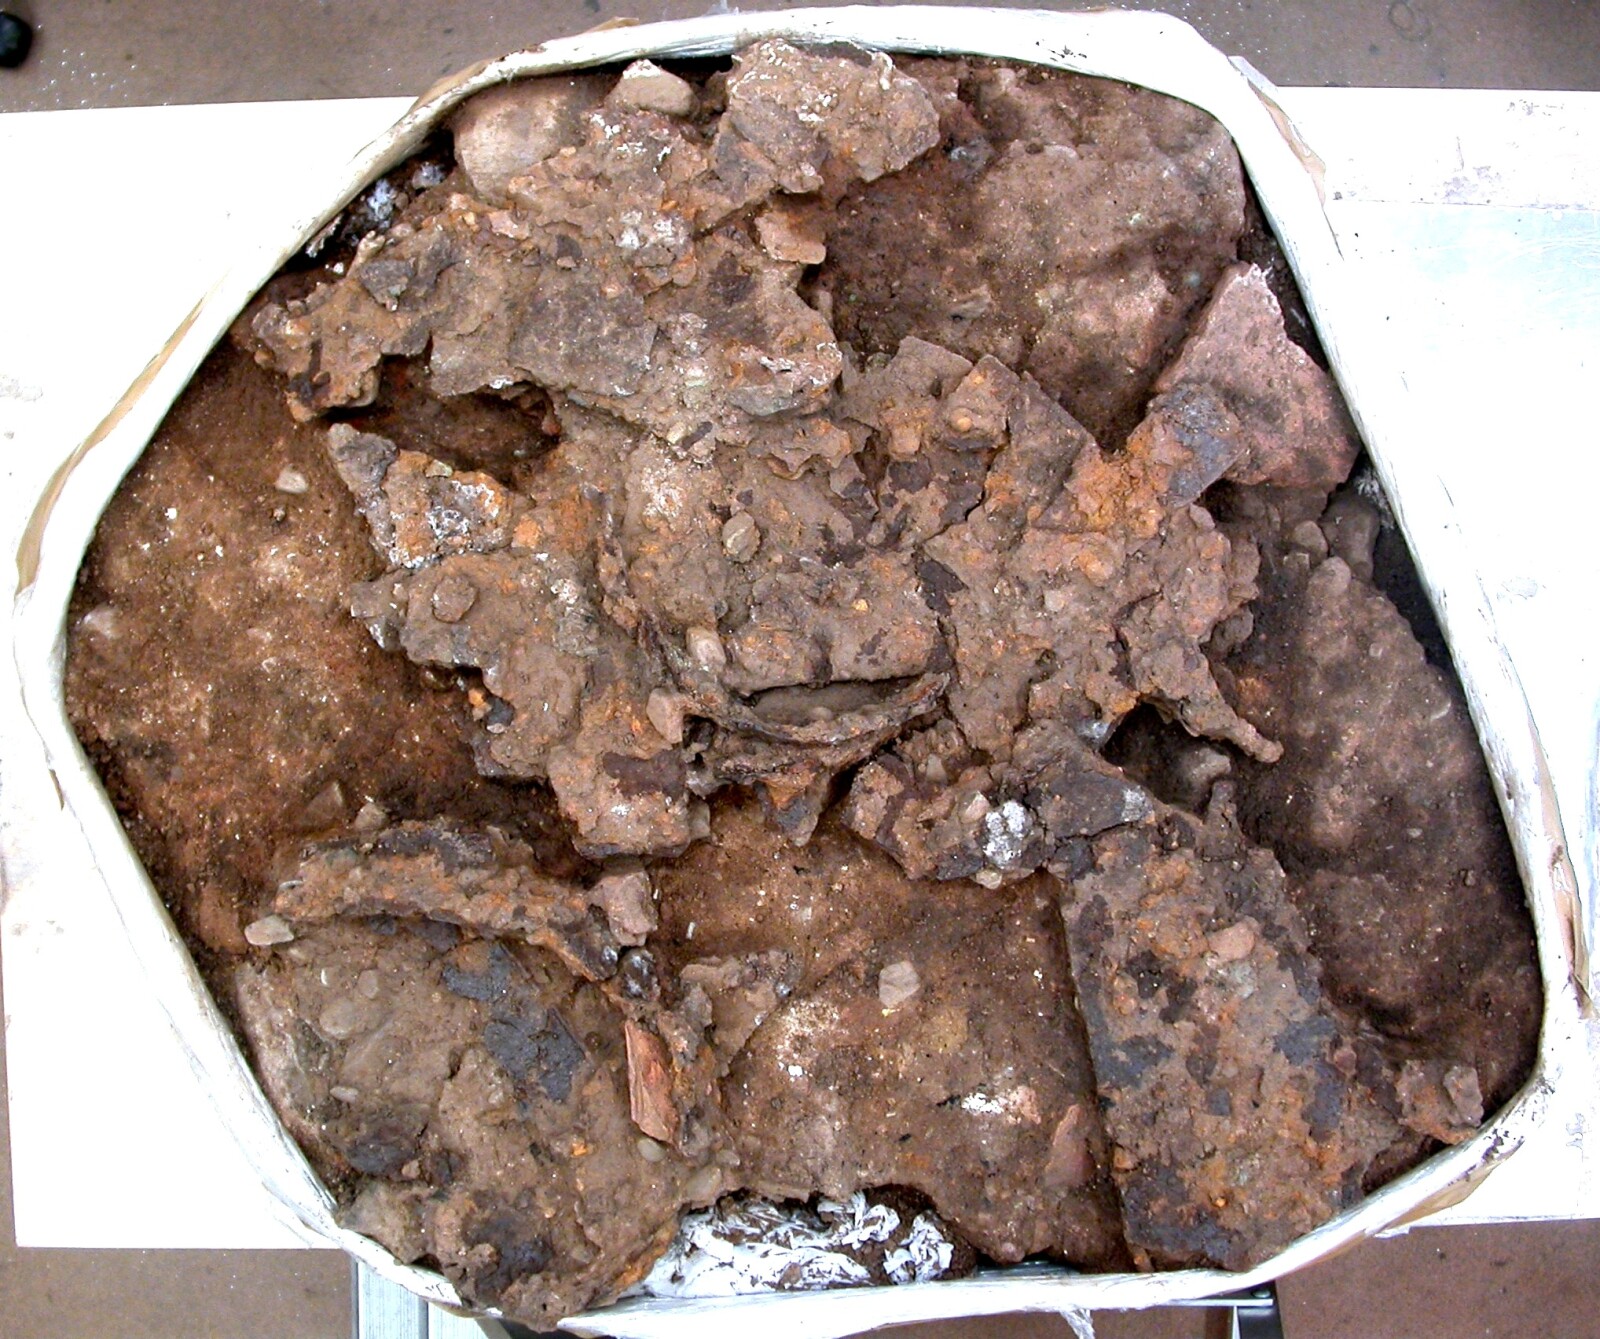
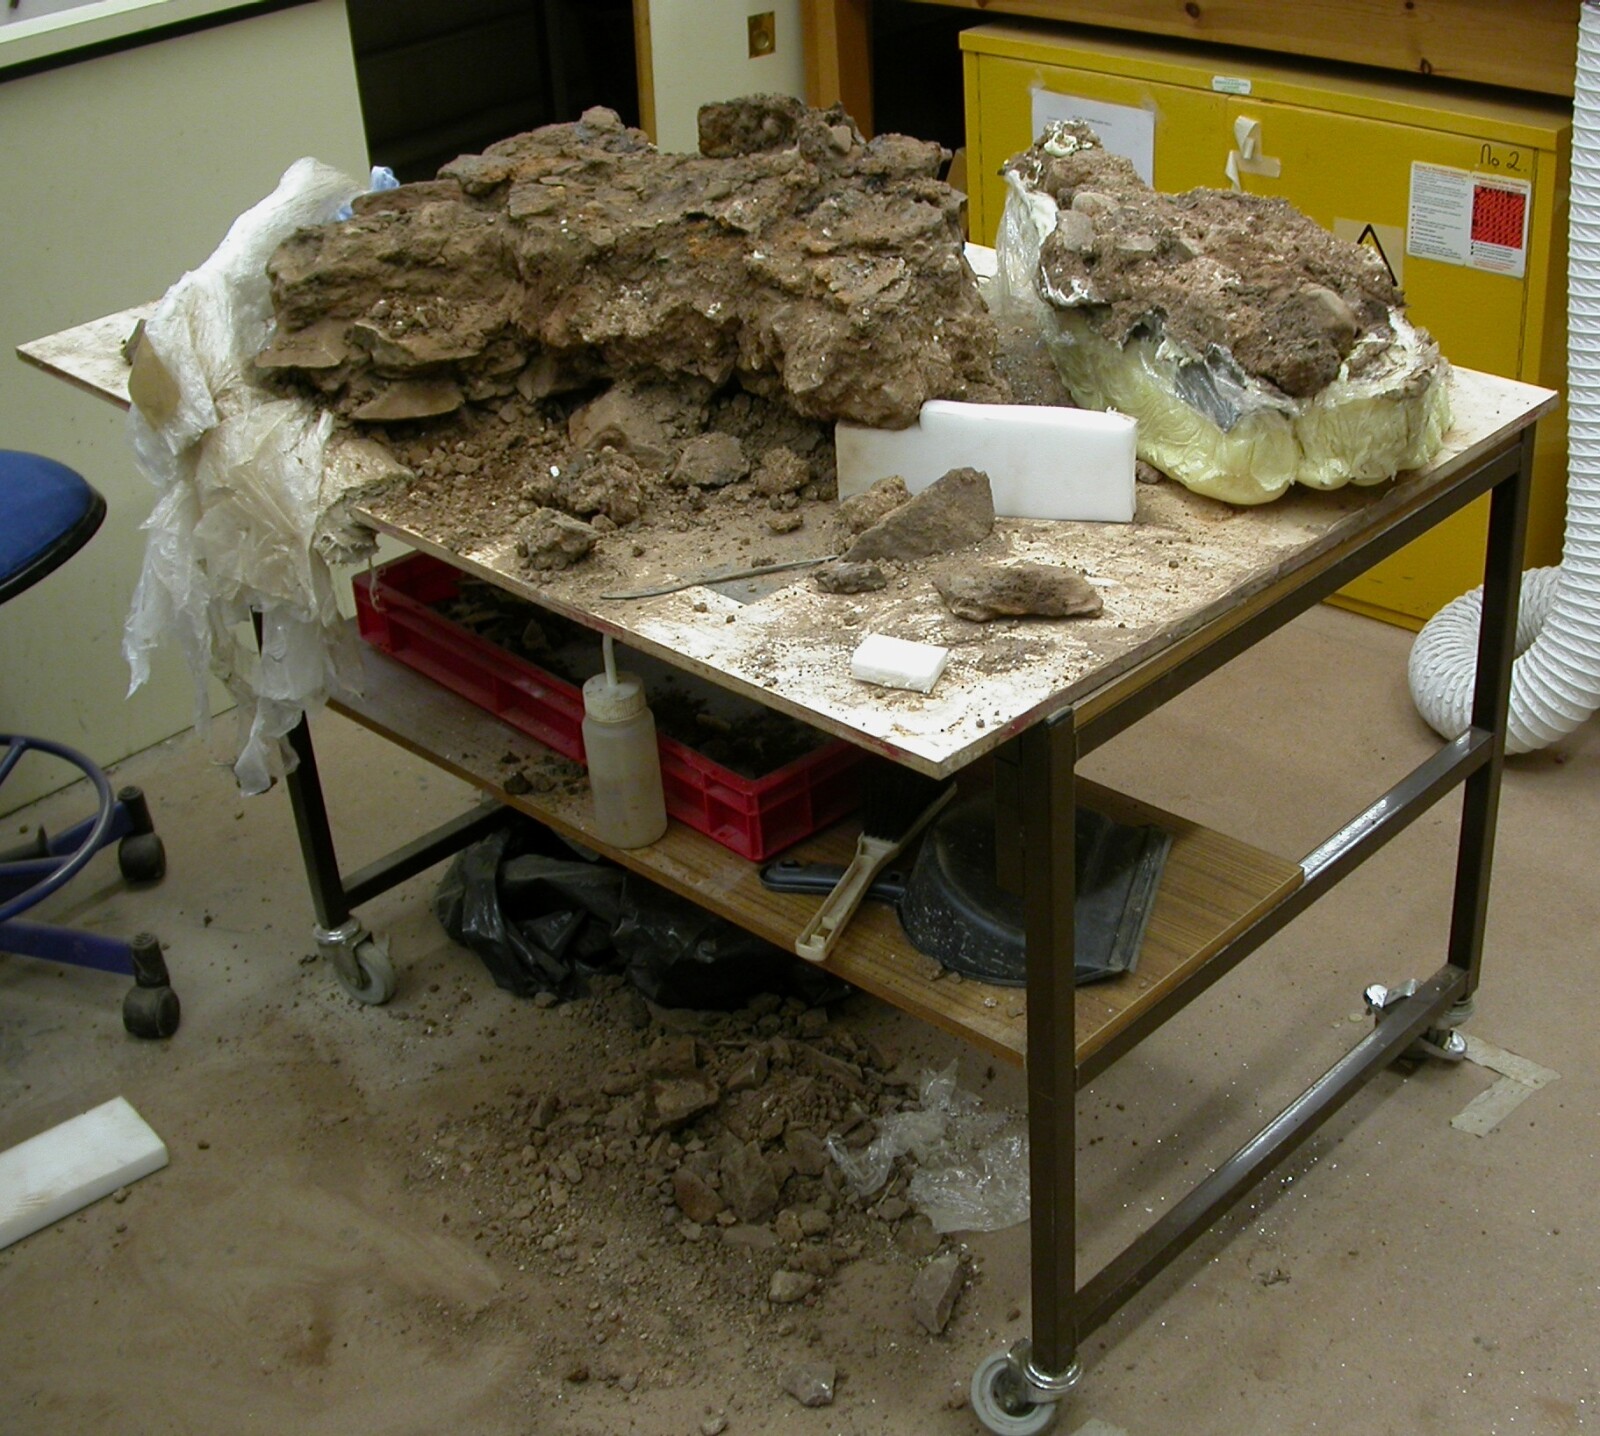
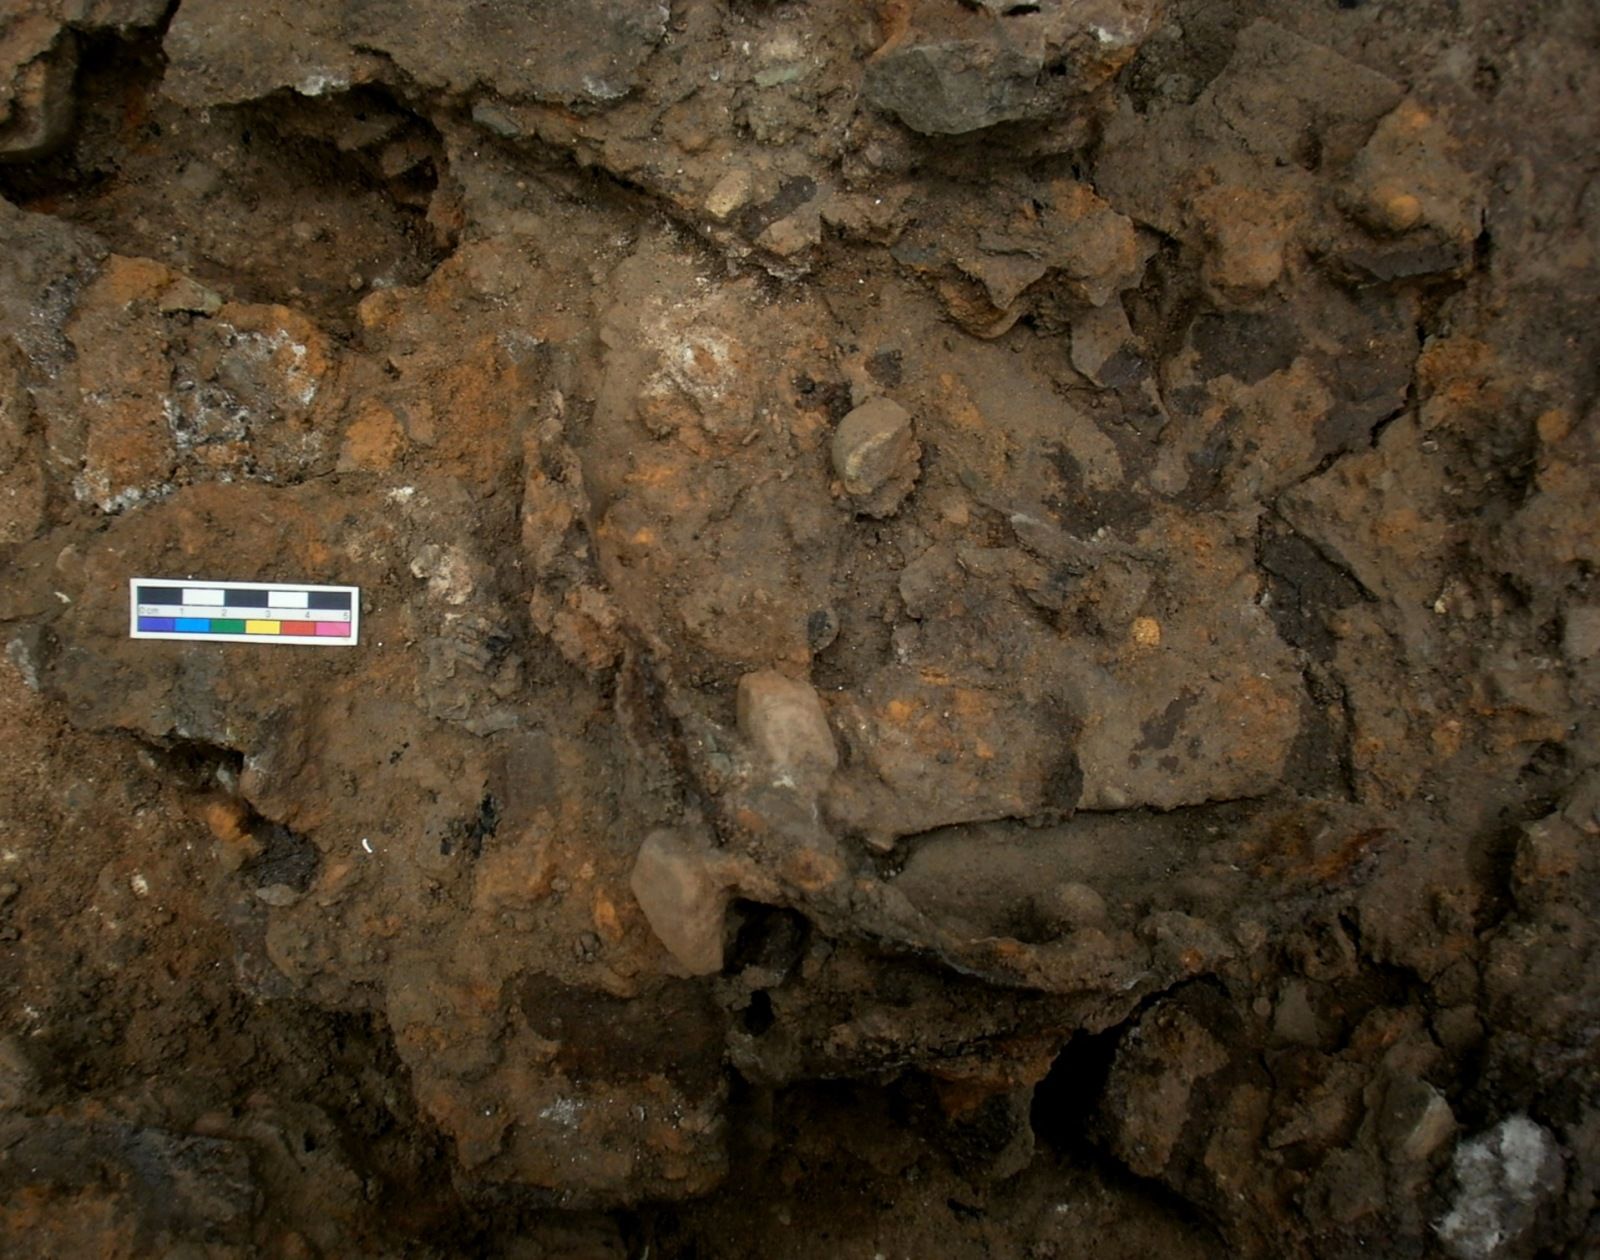
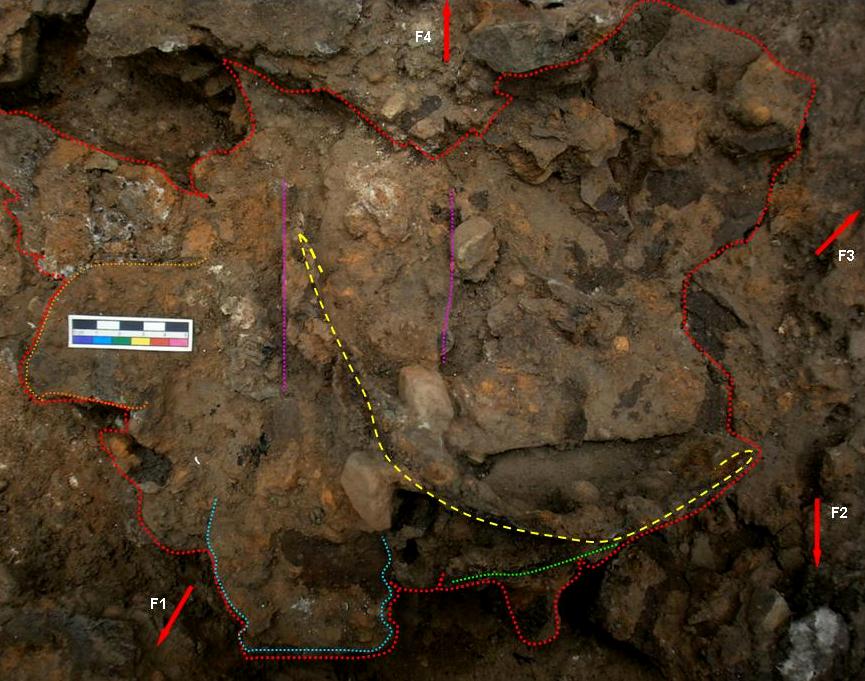
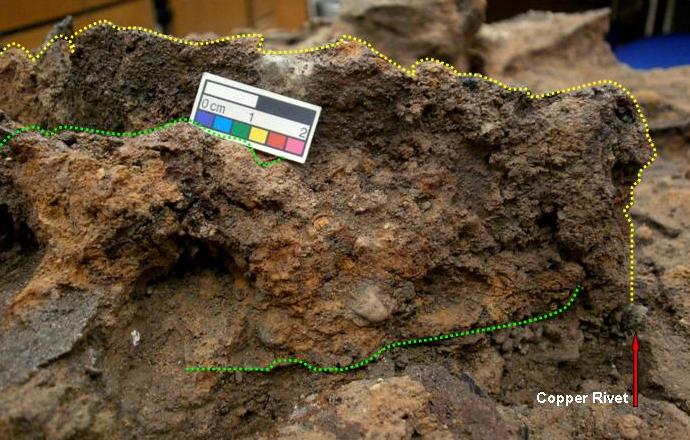
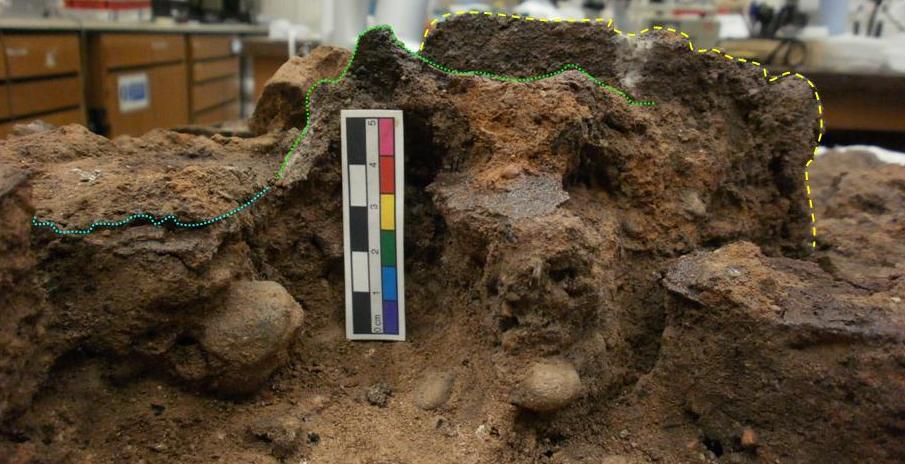
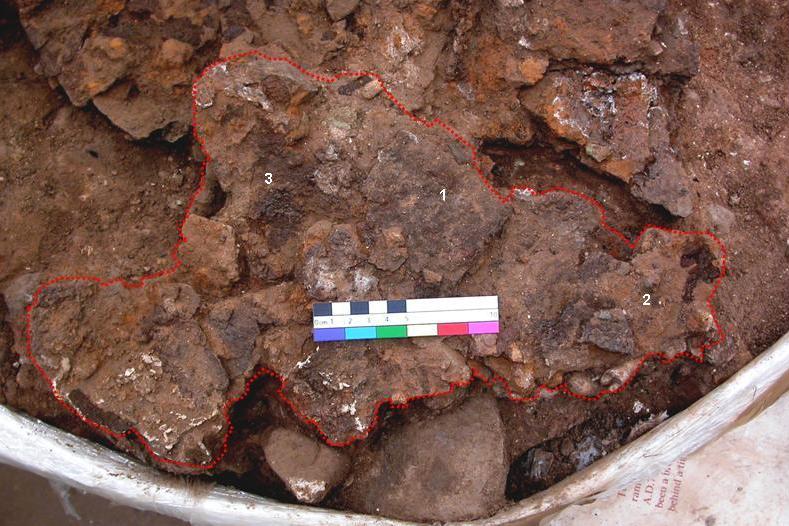
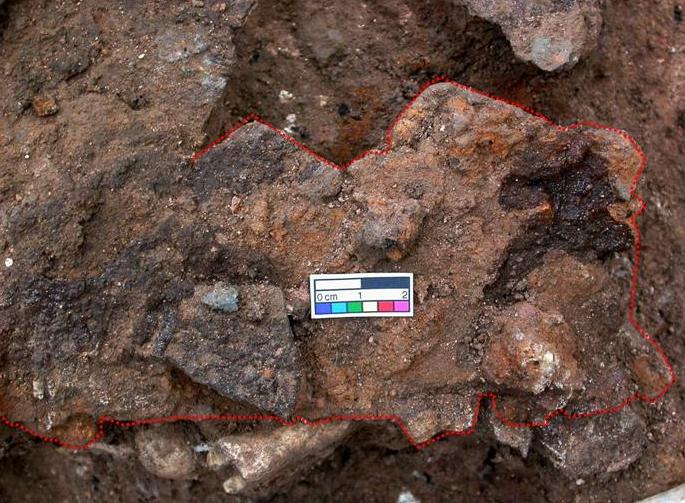
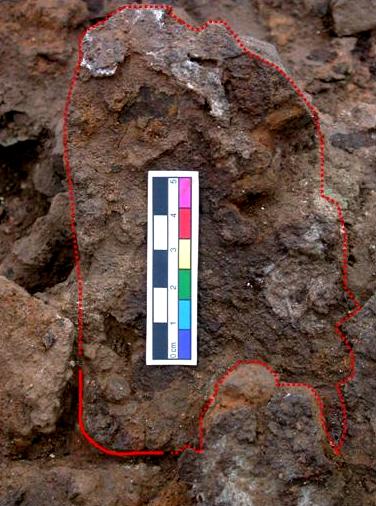
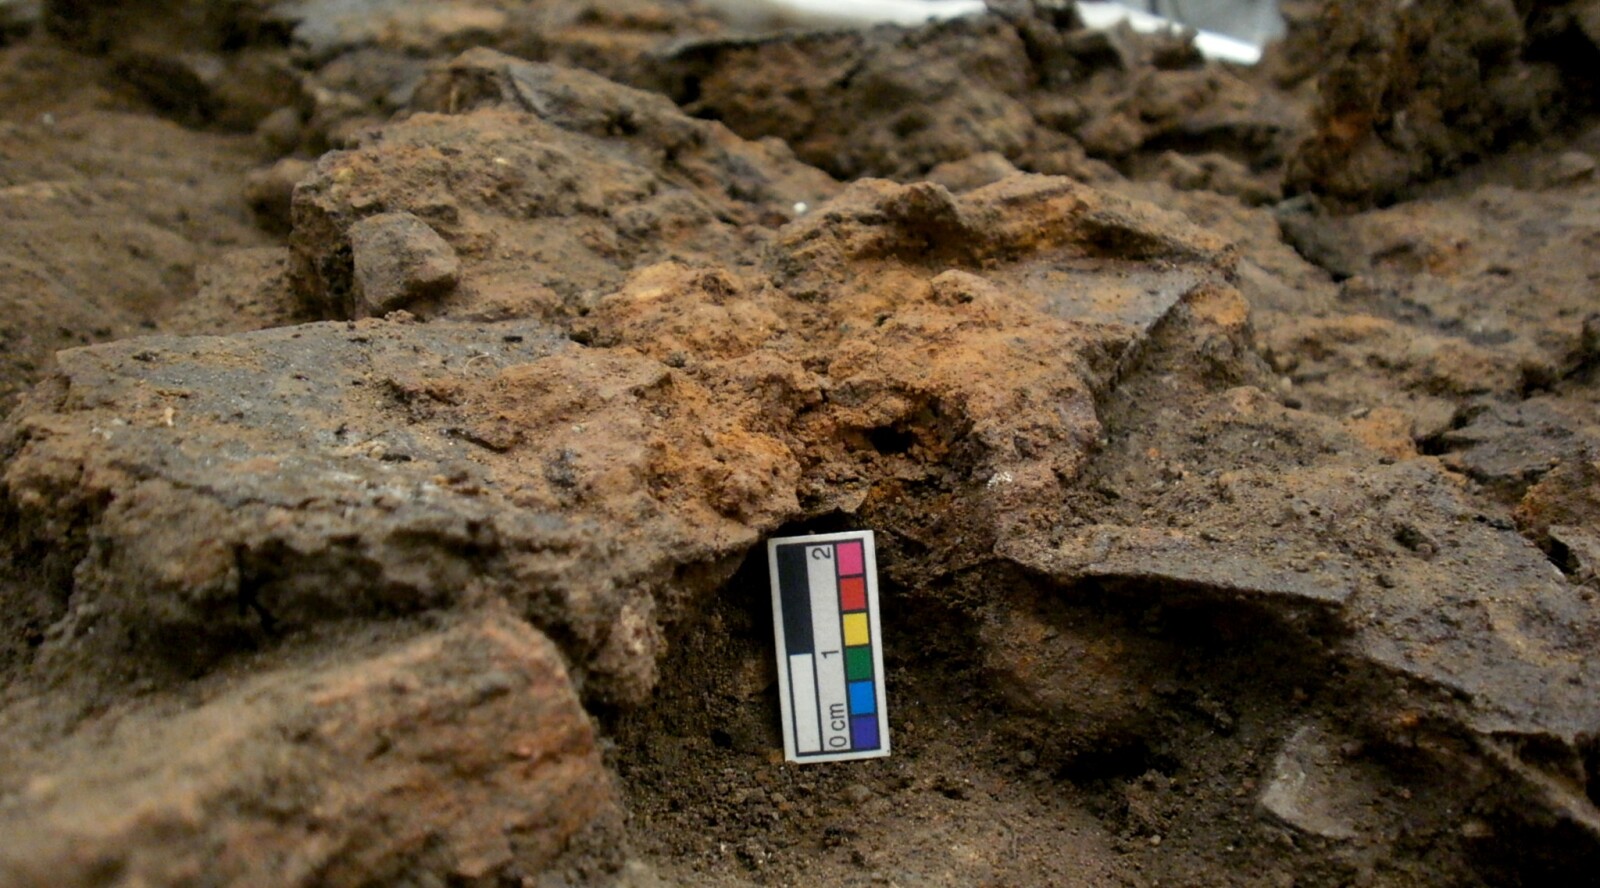
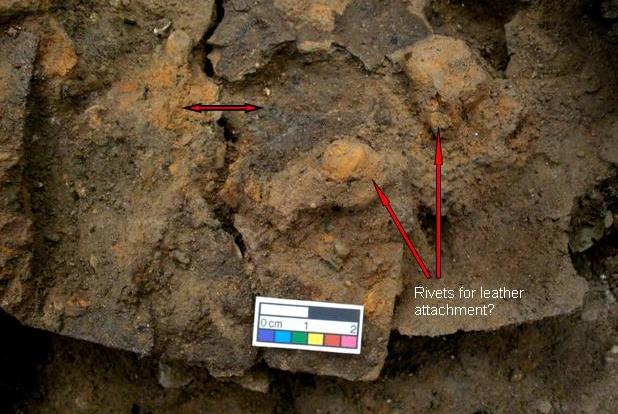
As readers can see by the first photograph which shows the whole soil block after the completion of micro-excavation, separating features was a difficult task: whilst feature 1 was a discrete item, easily removed from the rest of the block, I had to make certain executive decisions about breaking up the rest of the block. Where possible, I tried to divide the features from each other using the cracks that were already present in the block, or by cutting over and under overlapping features. Inevitably, some damage did occur to the peripheries of features during the lifting process.

The process of blocklifting was remarkably easy: effectively, I blocklifted these features in the same way that they were lifted on site, except that as I was working in a laboratory, I had the opportunity to use conservation-grade materials in a much more controlled environment.

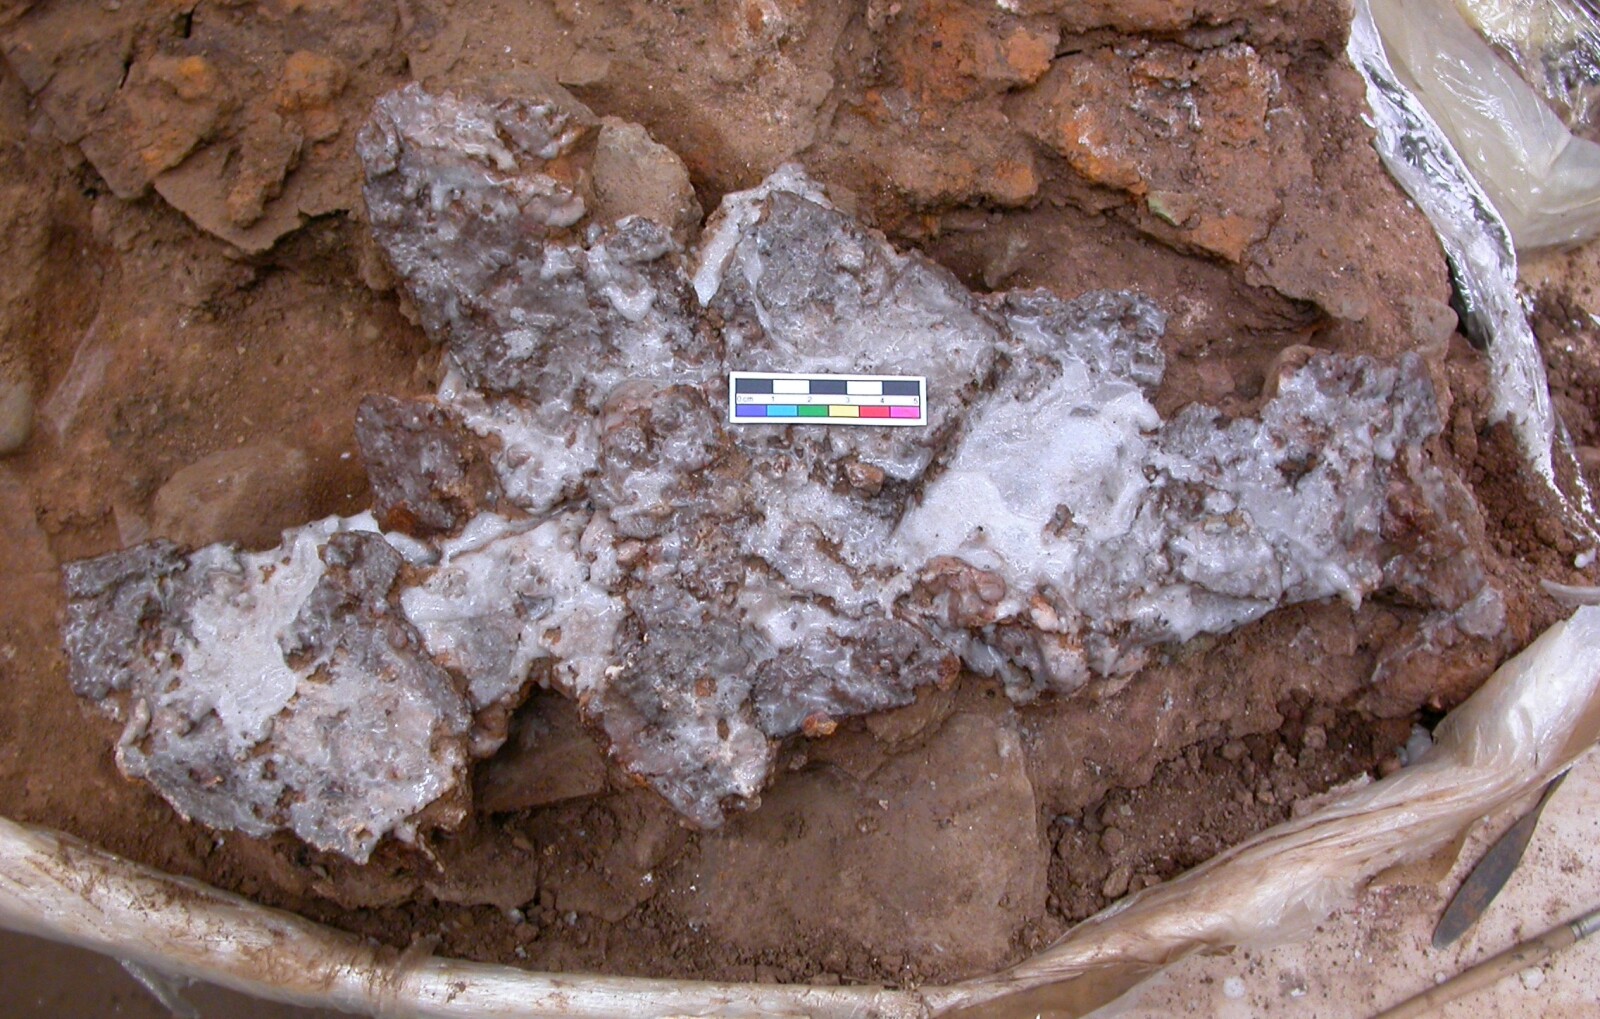
To begin with, I had to stabilise the artefacts in preparation for a process which would jar them quite a lot. I first consolidated the exposed artefacts using a removable adhesive called Paraloid B72, and then added a layer of melted wax, called Cyclododecane, to provide a more intimate support. Handily, this layer will eventually sublime by itself.

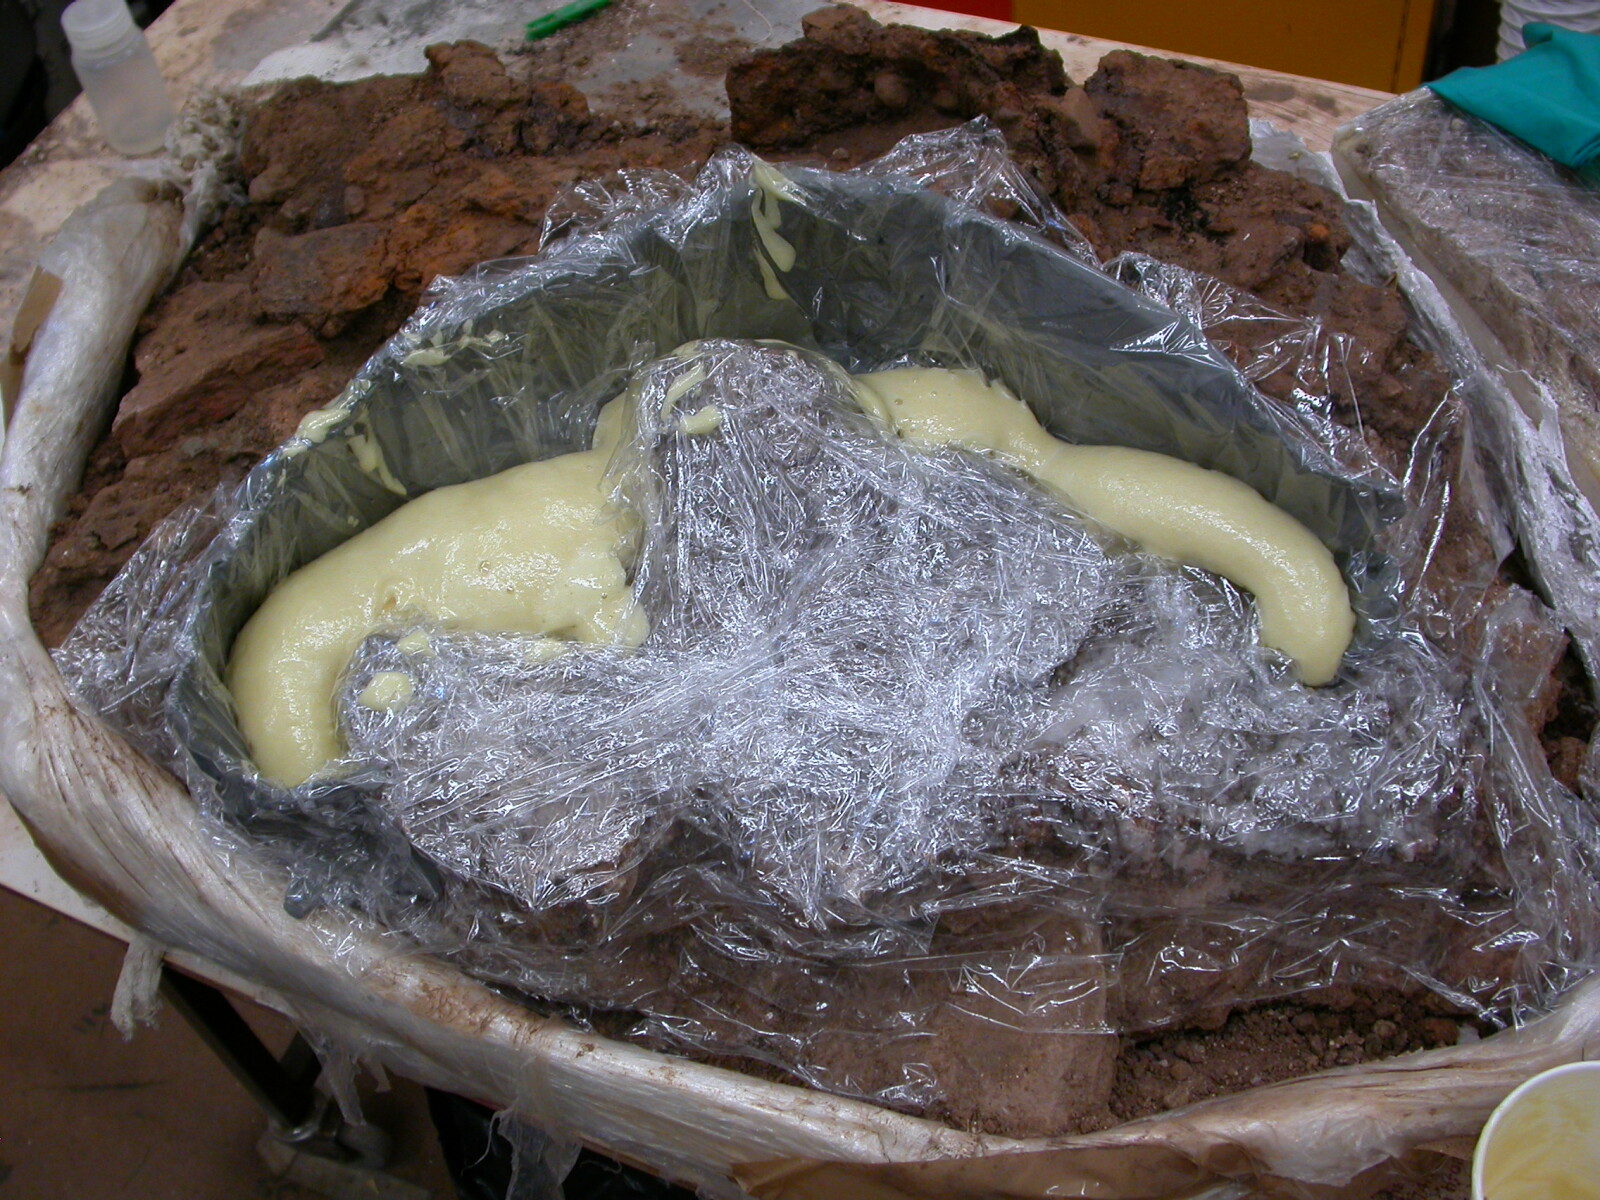
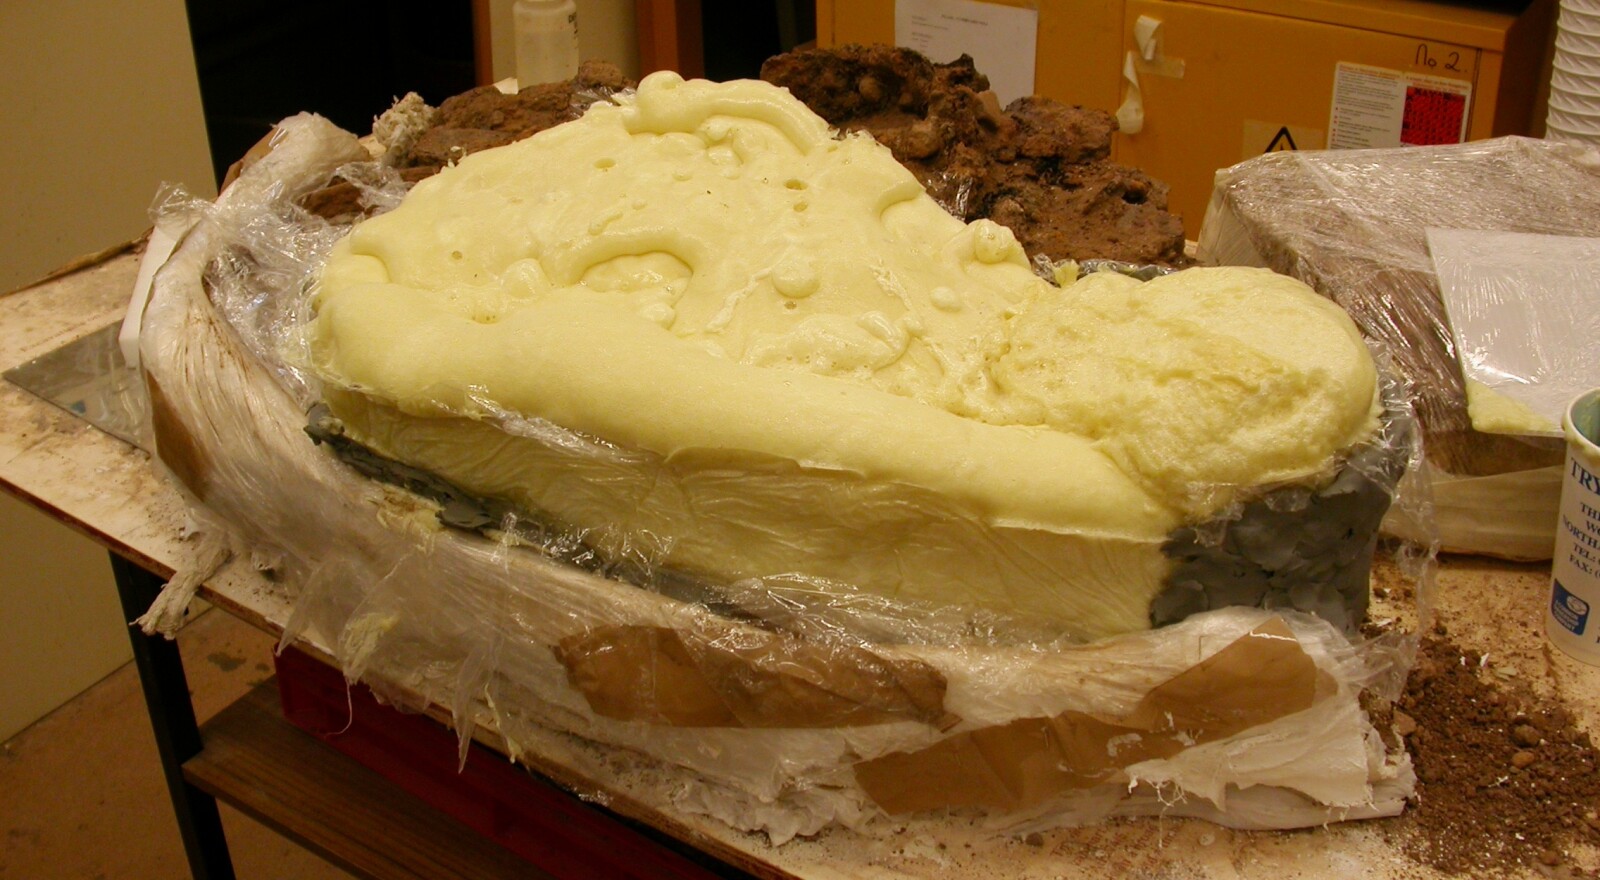
I then wrapped features in Clingfilm, to act as a barrier layer between the archaeology and the rigid material I would use hold the block together. For this, I selected polyurethane foam (readers may have come across this whilst completing DIY projects; it is often used as an insulating filler), as it has a very low density, and will not interfere with the attainment of an image of the mineralized iron plate. Polyurethane is prepared by mixing two liquid components together, and could be poured around the covered feature, reaching all nooks and crannies. Walls of plastic card and clay had been built around the feature to enclose the polyurethane.

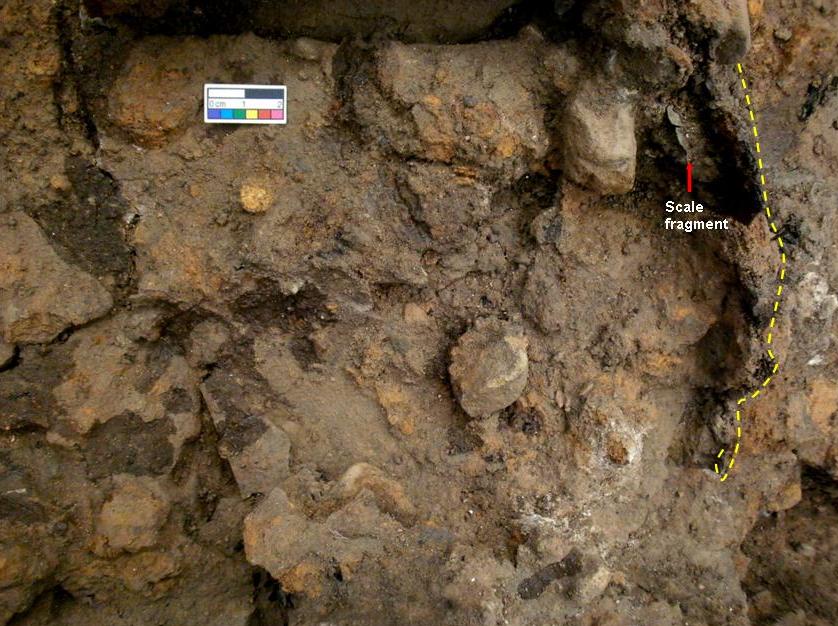
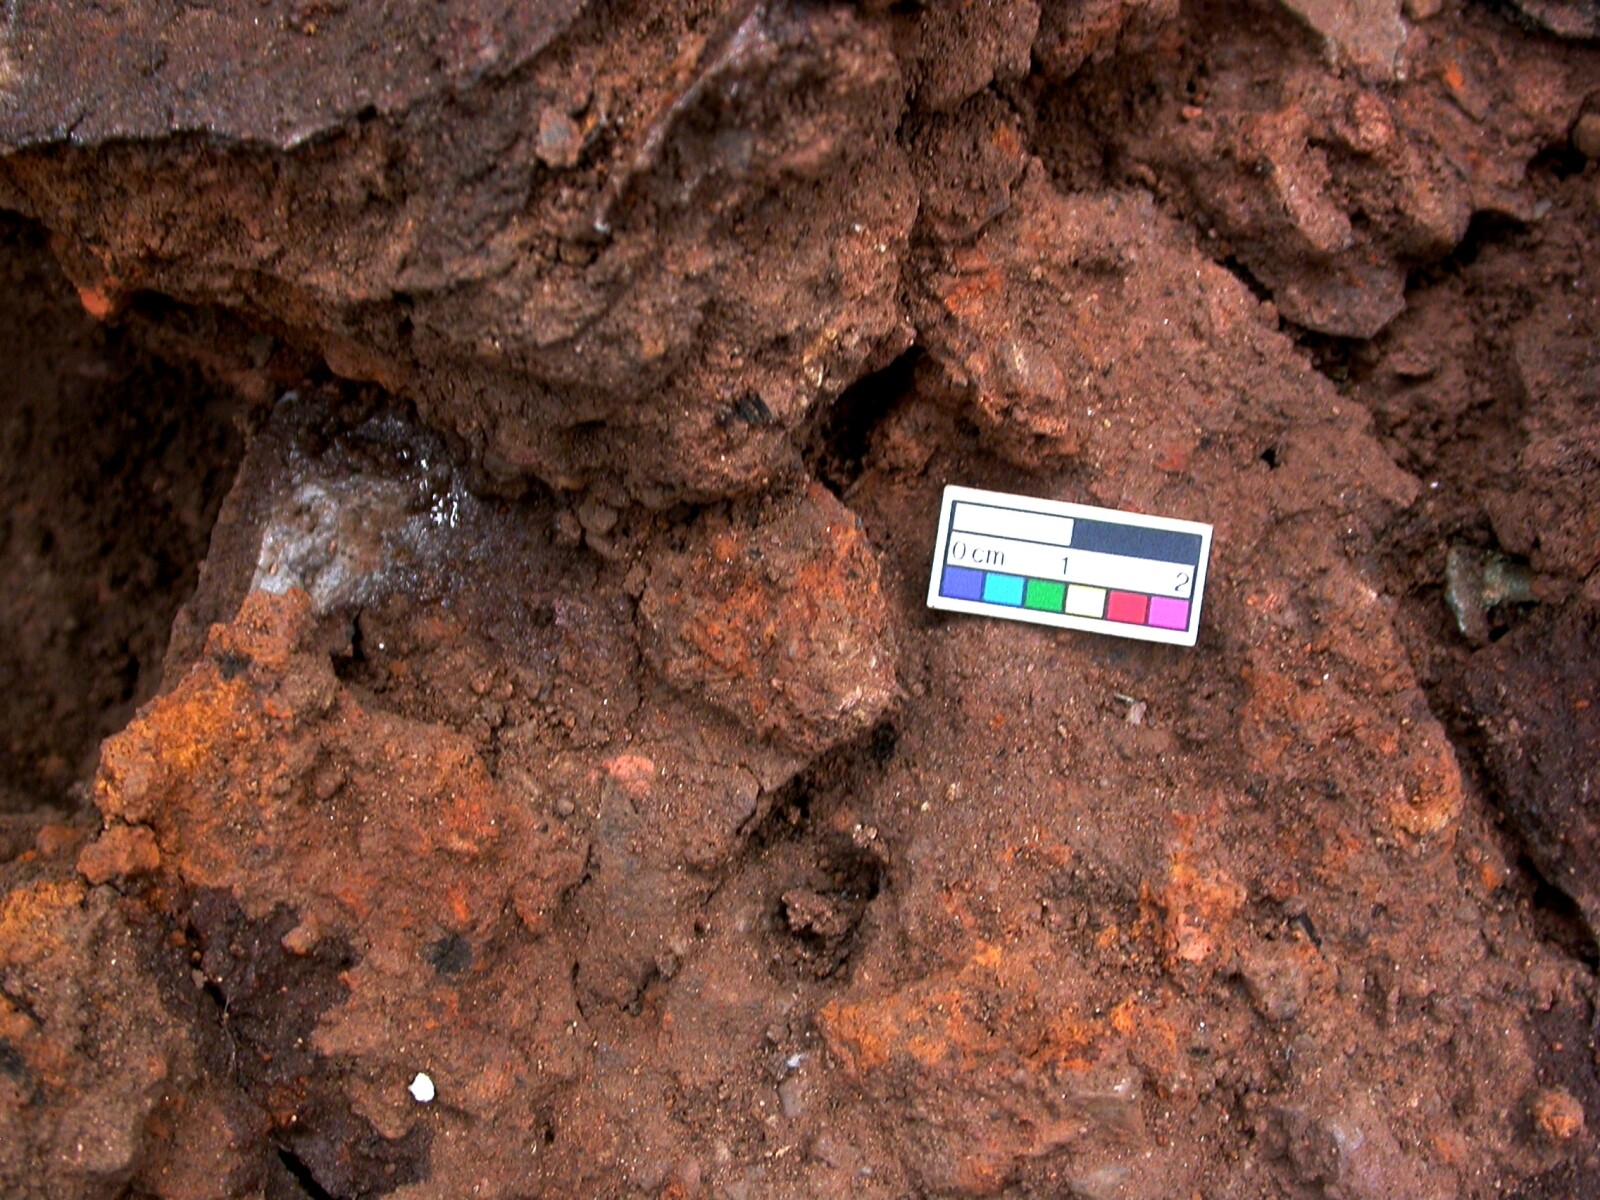
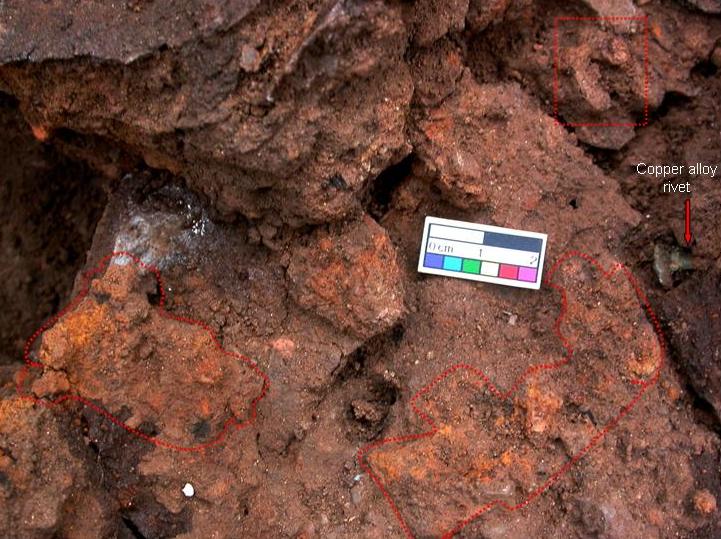
Once the polyurethane had hardened, I began to pedestal the feature being lifted, before undercutting it. The separated feature could be turned over, and large amounts of extraneous burial deposit removed, which would have otherwise interfered with x-raying the metal artefacts.

I repeated this process until all the features were lifted, and prepared for X-radiography.

Investigation of Caerleon Armour: X-radiography

28 October 2011

After having managed to break the large soil block up into small enough blocks to get into the x-ray machine, I finally began the task of x-raying the archaeological artefacts.

For this, I had the chance to use the Museum’s newly acquired computerised radiography system. Here, instead of using the traditional wet-plate method requiring film and much time spent in a dark room, we use a phosphor plate which can be used around 1000 times. This plate is read by a scanner, and an image produced within about 45 seconds.

This new system has allowed us to capture so much more detail about the inside of the blocks and the condition of the armour than would ever have been possible using the traditional method. The x-ray records the density of materials at every point, and the software used to view the image allows for manipulation in much the same way as programs like Photoshop: we can zoom into areas of the image, adjust brightness and contrast, apply filters, invert the negative, etc. Thus far all of the features have been x-rayed, and the results have been astounding: I have included copies of the images, complete with annotations. It would appear that a lot more existed beneath the surface excavated than previously supposed.

I had hoped that the x-rays could be used as a guide for further excavation of the features and eventual extraction of the artefacts: however, the condition of the metal inside suggests almost complete mineralization of the iron, and cautions against this course of action. The most that can really happen with these soil blocks now is that they are extensively x-rayed, and stored safely in case of future research.

Aside from highlighting areas of interest on the x-rays, and explaining certain phenomenon, my role as conservator for this project has come to an end. Now, curators, archaeologists and specialists will have to identify objects in the x-rays, marry up these images with the photographic record of my excavation, and begin to tie this information into the narrative of the site overall.

Caerleon Armour: Feature 5 and the Shoulder Plate

26 October 2011

This blog entry discusses the last area of the large soil block to be micro-excavated; feature ‘5’, located in the middle of the block. The position of the other ‘features’ (F1, F2, F3 and F4) in relation to this central one can be seen in the annotated photograph of feature 5, and plates with two identifiable edges have been outlined in various colours to guide the reader’s interpretation of this area. As with ‘feature 4’, feature 5 encompasses a large cluster of over-lapping iron plate, which have deteriorated significantly. In the centre is what looks like a shoulder plate (judging by the degree of curvature) lying on its side and seen in profile.

The third photograph show the back of the shoulder plate; you can clearly see how neat the corner of this plate is (despite the condition of the metal), and as with a plate in the previous entry, the corner of the plate looks rounded. Excitingly, a copper alloy rivets rests at the plate’s edge. Readers will have noticed that few copper artefacts or armour components have been recovered from the soil block assemblage overall- the armour (at least that which has been partially excavated) was efficiently stripped of copper fittings and pieces prior to deposition.

The fourth photograph illustrates the depth of the archaeology. Additionally, behind the main shoulder plate (outlined in yellow), is what I think is a second plate from the shoulder area of the cuirass (outlined in green). These plates were probably connected to each other in antiquity by the internal leather strapping, and it looks like their relationship has been preserved in the soil. Detecting the shorter edges of the second plate is difficult, as the heavily corroded plate has disappeared into a mass of blended of soil and iron corrosion products.

Beneath the first shoulder plate lies a distinctive plate with a good, clean edge (last photograph- as before, the shoulder plate is outlined using a dashed yellow line). This plate bears lumps of brighter orange corrosion products and given their relative size and positioning, I believe that these protuberances are all that remains of the interior fittings which would have held the leather attachments.

This entry marks the end of the micro-excavation stage of this conservation project: however, a huge amount of work remains to be completed before the contents of this soil block can be fully understood. As I have repeatedly mentioned, only x-rays will be able to provide us with a clearer idea of the exact condition of the iron artefacts, and of unseen objects beneath those excavated. The next stage will be to deconstruct the block into smaller blocks, of a size that will fit in the x-ray machine camber. The easiest way to complete this will be to essentially block lift the separate ‘features’ from the large soil block.

Micro-excavation of Caerleon Armour: Overlapping Plates and Curved Corners

25 October 2011

This is a very short entry today, introducing feature ‘4’ of the block- a mass of overlapping plate. It has been difficult in this area to detect the edges of separate plates, and few diagnostic features have appeared. The first two photographs show the ‘feature’ overall (remember that the boundaries of this area are arbitrary constructions), and as in the previous post, I have included annotated and unannotated photographs.

The ‘profile’ of feature 4 can be made out in the third photograph. You can clearly see the burial deposit the lorica is resting on here- a real rubbish layer of soil, stones, bone and tile. This room was clearly neglected long before the dumping of the military items.

The fourth and fifth photographs show areas labelled as ‘1’ and ‘2’ on the overall annotated photograph. These plates are slightly more distinguishable than most in this cluster, and are recognizably plates of a lorica segmentata cuirass. These plates have straight edges, and in the case of plate ‘2’, two parallel edges, which can be measured (this plate is 7.5 cm in width) - these are important dimensions for curators, who can compare these measurements with those of lorica plates from other Roman sites, and work out where on the cuirass they might have come from.

Finally, one of the most interesting artefacts to come out of this feature is the plate shown in the sixth photograph, labelled as ‘3’ on the overall shot. It measures 7 cm in width and has a curved corner- this is great to find, as the corners of lorica plates were slightly rounded for comfort’s sake. Thus far, this is the only plate uncovered in this whole assemblage with this trait.

Continued Excavation of Roman Armour: Problems with Corrosion

21 October 2011

This blog entry discusses the third section of the large soil block to be excavated: for ease of identification and documentation I have called this area ‘Feature 3’. This label will be important in the future, after I have deconstructed the block and need to be able to keep track of the position of groups of artefacts within this large assemblage. This instalment discusses a relatively small area of the block, with the main focus resting not so much on the lorica plates present, but on the corroded remains of fittings attached to them.

As here we are chiefly looking at vague shapes, I felt that it was important for this entry to include both annotated and un-annotated versions of photographs, so readers can come to conclusions without my interference. The first photograph is an image of this third part overall, and the second photograph includes arrows and boxes indicating particular areas of interest examined in this entry. The third photograph has been included to give the reader an idea of the depth of the archaeological artefacts, the thickness of the iron plate, and an impression of the poor condition of the remains.

In order to introduce the ‘fittings’, a short note on the corrosion processes that have taken place in these blocks is most definitely necessary. The more I excavate and study this block the more I realise that the different components of the lorica segmentata have corroded in dissimilar ways. The exposed plate has a firm, dark magnetite surface, on top of which are localised areas of powdery, orange corrosion. I believe this second, more disruptive type of corrosion product (an iron oxide), are the remains of iron rivets and fittings.

I think there are two reasons for the fittings to have corroded in a different way to the iron plate: firstly, as a result of being in contact with the leather strap which would have run vertically the length of the inside of the cuirass- the release of acetic acid by the leather could have jumpstarted corrosion. Secondly, the fittings could have corroded more quickly than iron plate, given the greater amount of working and energy required to create there more complicated shapes. The fourth photograph I think illustrates my theory quite clearly: here we are looking at rivets, belonging to two overlapping plates (which could well be in this position because they were neighbouring plates on the cuirass when in use, and at the time of deposition), that have corroded more drastically than the plate. I believe, given their shape and positioning these were rivets and washers holding the leather straps, and we are looking at the interior side of the plate.

Working on the above theory, the fifth photograph shows a detail photograph of the area enclosed within the dashed red box and marked with a ‘1’ on the main annotated overview. I believe this lumpy feature, clearly different in colour and texture to the plate underneath, is again the remains of rivets and washers holding the internal leather straps in place. You can see here how an iron component can corrode in such a way as to increase in physical size: the resulting ‘object’ is larger than the item really was in antiquity.

The sixth and seventh photographs show another area of plate with corroded fittings (and in the corner, a copper alloy rivet).Here we can see a rectangular feature (outlined in the seventh photograph), which I believe is essentially iron corrosion, holding the shape of a now non-existent leather strap.

An x-ray will hopefully provide more information about these ephemeral features, though detecting areas of corroded and degraded material (which will have a low density) on a background of denser archaeological artefacts and burial deposit, could be difficult.